Thanks to everyone who’s entered the Artograph Projector Giveaway so far and helped spread the word about it!! Just a reminder to please leave a separate comment for each of your entries (following, liking on FB, posting on your blog, etc.) I’m going to be drawing a comment number at Random, and I want you to have all the entries you are entitled to! :)
Also, if you have not yet done it, please make sure that you have an email address associated with your Google profile. This way, I can get a hold of you if you win! It also makes is SO much easier for me and other bloggers to personally respond to your lovely comments. :) Here’s how you do it:
Go to your Blogger dashboard.
Click on "Edit Profile."
Make sure the e-mail address listed is the one you want people to respond to.
Check "show my e-mail" under the privacy settings.
Most of you, I’m sure, have heard of the quite lovely Miss Mustard Seed. If you haven’t, I’m thrilled to introduce you to her! Her blog is a wealth of inspiration, and her growing success as a business woman in a creative enterprise has emboldened me and countless others to follow our dreams of making lovely things for others to enjoy. One of my favorite things Marian makes are her vintage inspired signs that she creates using (what else?) a projector! Here’s her tutorial on how she goes about making her fantastic old (looking) signs:
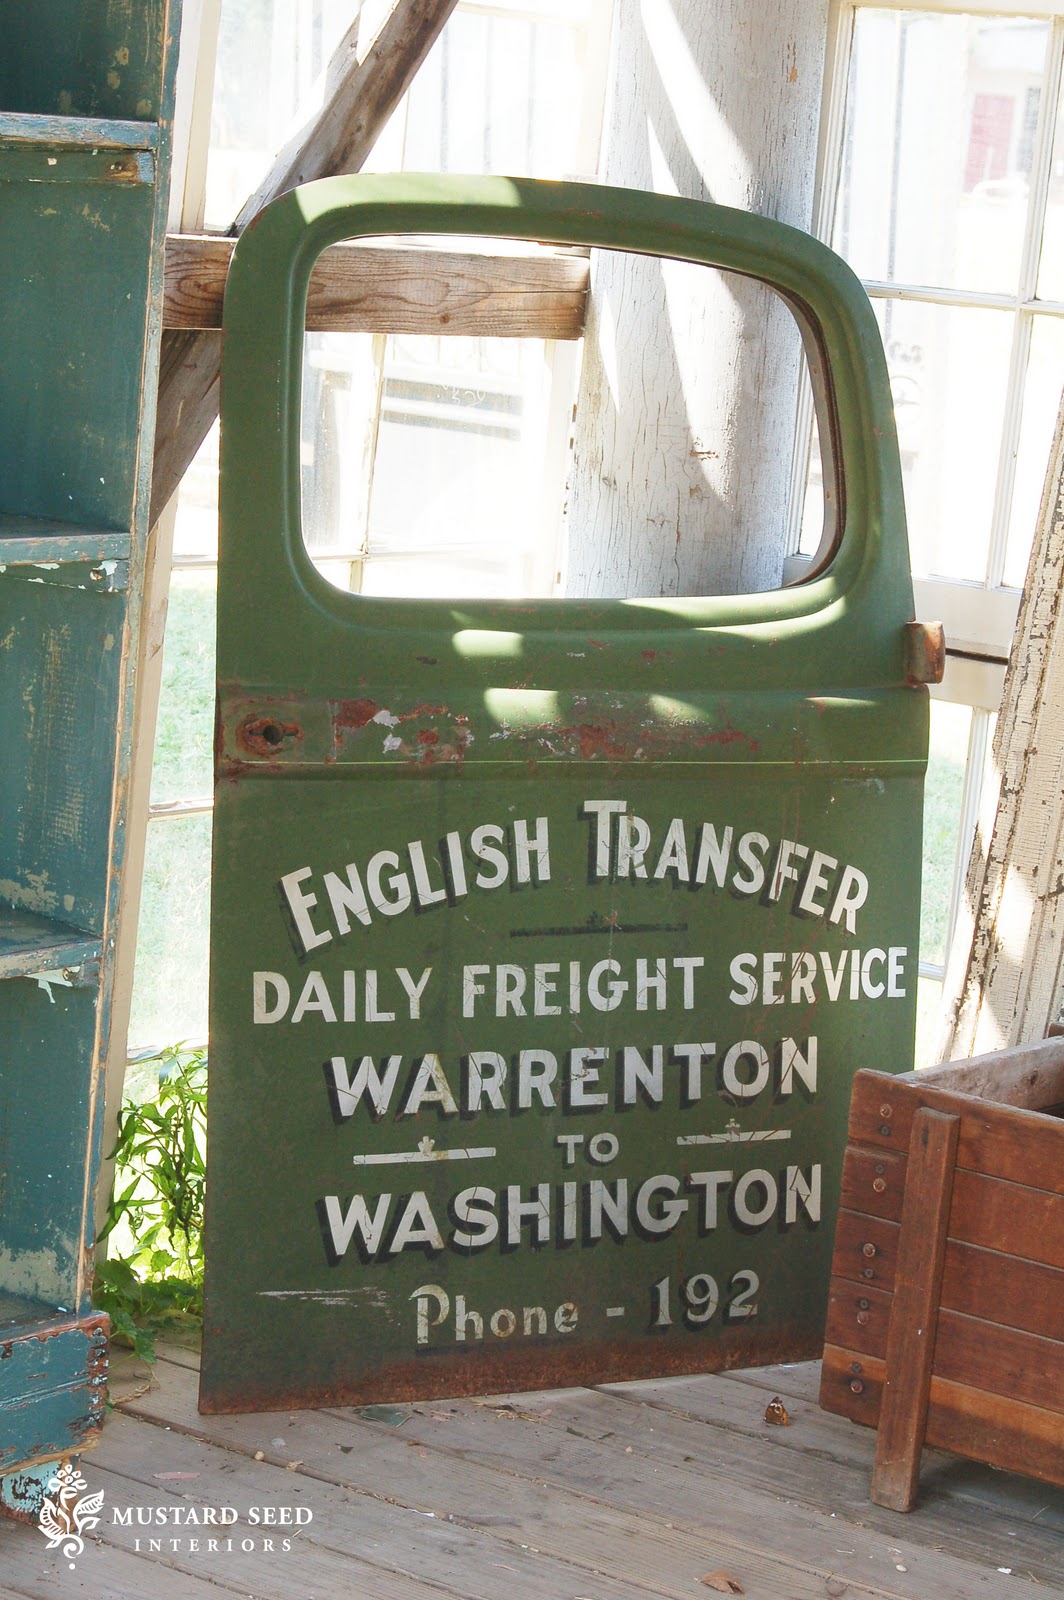
I am finally coming good on my promise to reveal some of my sign-making secrets. Before you get intimidated and think, "I can't paint. I can't draw. My lettering always ends up looking all funky and like a second grader made it." Let me assure you that anyone can make these signs.
Start off by finding something to paint. I prefer old doors and boards that I find at antique stores, yard sales and flea markets. I like that they have an age to them already, so I don't have to create that. Try to look at things in new ways. I've used sides of an old crate, table leaves, and a dismantled shelf to make signs. If you can't find old doors or wood, though, don't despair. Some crackle medium, distressing and glaze can make any piece of wood look old.
The second thing you need to do is create your design. I look for inspiration everywhere and snap pictures if I see old signs or cool designs I like. I don't copy them, but I use them for inspiration.
I use MS Word to develop layout and select the fonts. I'll then use a sketch or clip art if I want to add a picture to the sign.
The third step is to transfer your design onto your board/door. I use a projector, which is an awesome tool for this. It's much more flexible than stencils and is faster than using a transfer method. A projector is about a $100 investment, but it's well worth it if you're selling your work or making a lot of signs for you home, friends and family.
If you don't have a projector or cannot justify buying one, you can use graphite transfer paper. Simply print your image to size and trace over the lettering with the transfer paper between the image and the board. A Cricut or Silhouette is also a handy tool for making your own stencils.
Paint over your traced design using whatever color you want. I use acrylic paints and generally mix them to achieve the desired color.
Once the paint is dry, sand it gently to distress and apply an antique glaze over the entire piece to bring it all together. I generally use dark walnut wood stain on my signs. If there is original paint on the antique door, I'll sand (wearing a respirator) and seal it with polycrylic before painting the sign. Please read my post on
lead paint, if you're unaware of the dangers.
So, those are the basics for making a good sign, but the one last component is one I can't teach you. It's a sense of what is going to look good. I play around a lot with fonts, designs and borders before I get to the painting. I also try to match up the design to the kind of wood or door I am painting on, so the sign looks authentic. This just takes research, practice and developing your gut feel for it.
I hope this gives you some ideas and confidence to go make signs of your own or at least it gave you a point in the right direction!
I also have not forgotten about the video tutorials. I filmed two of them last week, but it sounded like two children (mine) were being tortured in the background, so I need to film them again when I have a quiet house.
Thanks to Miss Mustard Seed, Marian, for helping to get the word out about this giveaway, and for permission to repost her fantastic tutorial!
If you haven’t done so yet, make sure you enter the giveaway and you could win yourself a brand new Artograph Super Prism Projector and be on your way to creating gorgeous signs like these!


Hi Ann Marie, Marian is such a doll and I love her signs! This post is where I learned she uses a projector. Now if only I had a projector I could make my own signs. hint hint...
ReplyDeletexoxo,
Sherry
Thank you so much for this post, this is something I have wanted to do more of but I did not know the secret! I was hoping someone would do an ebook or something so I could learn (yes, I was willing to pay) I'm gonna have to enter the contest tonight when I get home!
ReplyDeleteWhere do I buy a projector and what one should I get to transfer? Ty :)
ReplyDelete